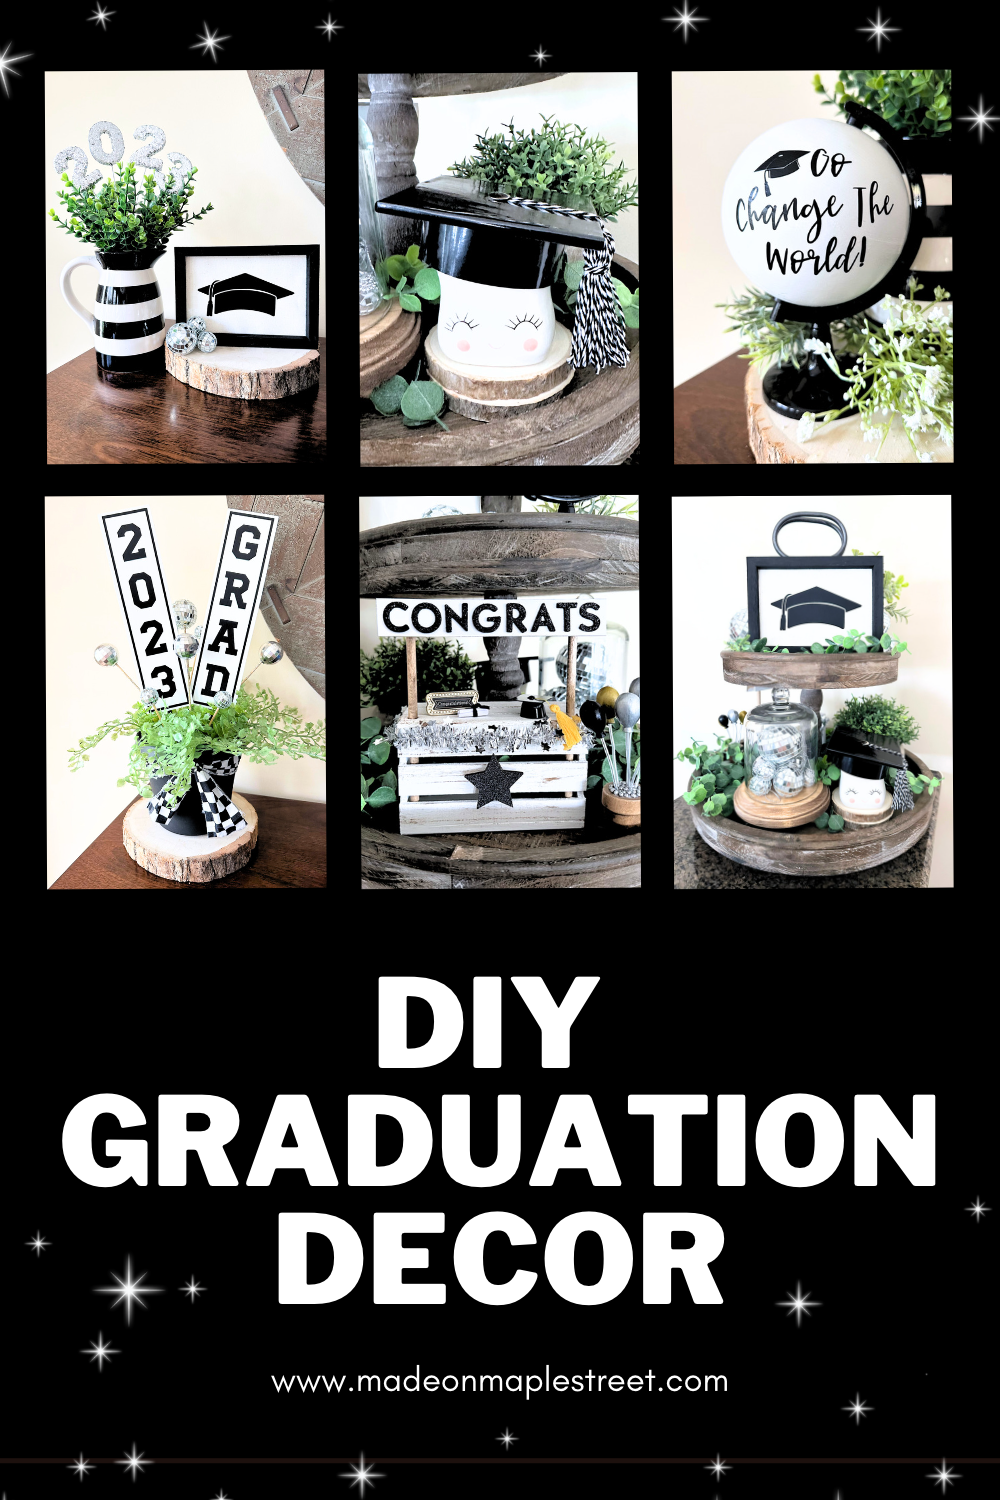
DIY Graduation Decor


This year, we are celebrating two graduations at our house because my son is graduating from high school and my husband is graduating with his master's degree.
I wanted to create a few pieces of decor to commemorate this special time in our lives but since my son and husband each have different school colors, I decided to stick with a black-and-white color palette for these projects.
The great thing about these pieces is that they can easily be customized to any color scheme.

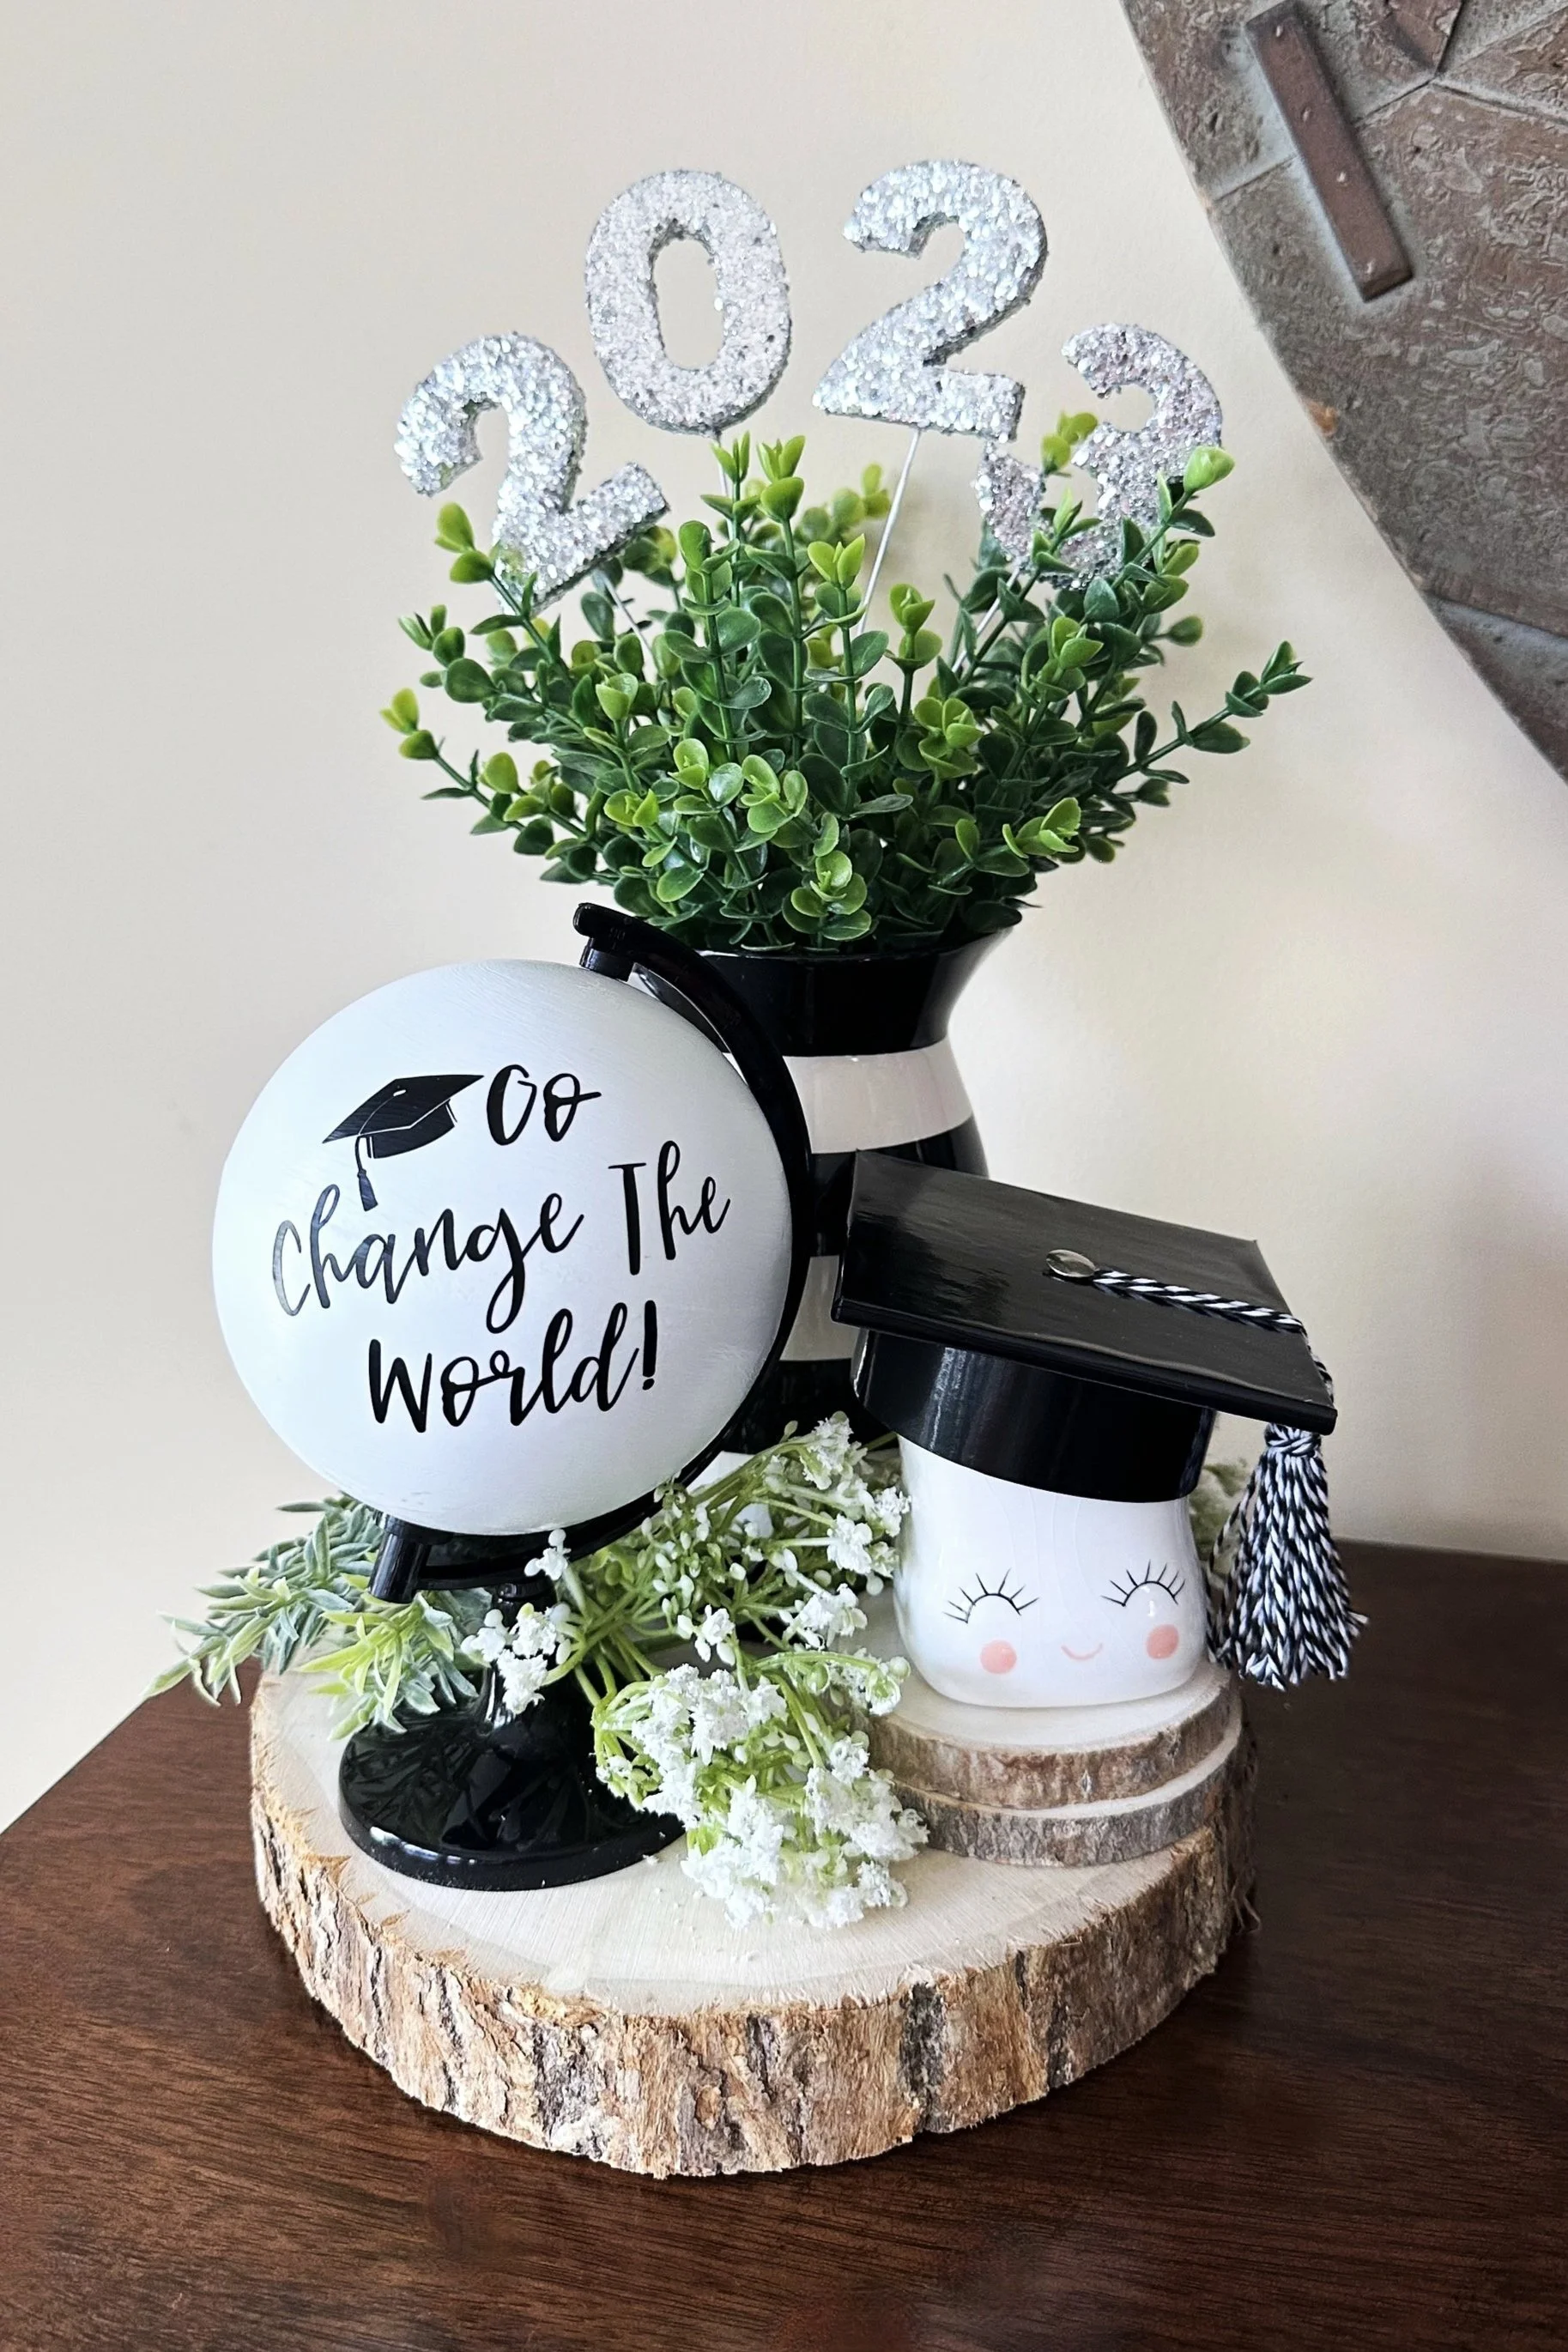
Go Change the World Globe
For this project, I purchased a small plastic globe from Amazon.
I gave the sphere several coats of white chalk paint to make sure none of the original colors were visible.
Once the paint dried, I applied a layer of matte Mod Podge to the sphere to protect it from scratches.
I designed a decal that says “Go Change the World” in Cricut Design Space and cut it out of black adhesive vinyl. Then I carefully applied the vinyl to the sphere, working in small sections until the decal was firmly attached.
I applied a layer of matte Mod Podge to the vinyl, just to be sure it stayed in place.
This quick graduation DIY is definitely a favorite.

Graduation Crate Stand
I love making interchangeable stands for each season so I thought it would be fun to make one for graduation as well. Check out this video if you’d like to learn how to create your own interchangeable crate stand.
To make the sign for the top of the stand, I used a jumbo craft stick from Walmart. I cut off the rounded ends of the stick with steel snips.
After sanding the rough edges on the ends of the stick, I gave the front and sides a coat of white chalk paint.
For the word at the top of the crate, I purchased a set of foam letter stickers from Hobby Lobby. I found the letters for the word “Congrats” and stuck them on a piece of parchment paper. Then I used Barely Art Craft Glue to adhere the letters to the craft stick.
I thought about making a sign for the front of the crate that says “Class of 2023” but I wanted to be able to reuse the embellishment in the future so I decided to use a star instead. I covered it with Dollar Tree black glitter vinyl.
To assemble the piece, I took three button magnets from a package I purchased at Dollar Tree and placed one magnet on each of the existing magnets on the crate.
I used hot glue to attach the star to the bottom magnet.
Then I put hot glue on the top magnets and stuck the “Congrats” sign onto those magnets.
To make a banner for the stand, I found a silver star garland in my stash that I purchased on clearance after Christmas. I wrapped the garland around the front of the crate and clipped it into the clothespins on the back.
For the top of the crate, I purchased a set of mini graduation items from Michaels and placed the items on the stand.
In my last Temu order, I purchased a set of mini balloons that I knew would be perfect for this project. The colors were a little too bright for this project so I used gold, silver, and black paint to give them a makeover.
To keep the paint from scratching off the balloons, I gave them each a coat of glossy Mod Podge.
I needed something to hold the balloons so I used a tiny wooden flower pot from Dollar Tree.
I put a small styrofoam ball in the flower pot and secured it in place with hot glue.
Then stuck the wires that came with the balloons down into the styrofoam ball. I trimmed the wires with a wire cutter and put the balloons on the wires, doing my best to disperse the colors evenly.
To make the balloon arrangement look more polished, I put tacky glue over the styrofoam ball in the pot and used tweezers to place silver styrofoam beads into the glue.
I love that this DIY Dollar Tree crate stand can be used to celebrate a wide variety of occasions.

Graduation Plant Display
For this DIY, I started with two hanging rectangular wood signs from Dollar Tree.
After removing the twine hangers, I filled in the holes on the boards with wood filler.
Once the wood filler was dry, I lightly sanded the signs with a sanding sponge. Then I gave the front, sides, and back of each sign two coats of white chalk paint.
Next, I used my Cricut machine to cut decals out of black adhesive vinyl and applied them to the fronts of the signs.
To help the signs stand up, I found two wooden dowels in my craft stash and gave each of them a coat of black chalk paint.
Once the paint was dry, I used a combination of wood glue and hot glue to attach the dowels to the backs of the signs.
To assemble the piece, I put a piece of floral foam in the bottom of a black plastic Dollar Tree pot and used hot glue to keep it in place. Then I trimmed another piece of floral foam and glued that on top of the first piece.
After making sure the glue on the dowels was dry, I stuck the signs down into the foam.
Then I used a wire cutter to cut several pieces of greenery off of various Dollar Tree picks and arranged the greenery around the signs, making sure the foam was covered and there were no empty spaces.
To add some sparkle to the display, I pulled a few disco balls off of a headband I purchased on clearance after the new year. I put bamboo skewers in the holes of the disco balls and used hot glue to secure them in place. Then I stuck the bamboo skewers into the floral foam.
For a little more variety, I added a few disco ball ornaments as well.
Then I tore two strips of fabric off of a piece I purchased at Dollar Tree. I tied the strips together to make a longer piece. I tacked the fabric to the back of the pot and then wrapped it around the top, tying it in the front.
When I started, I had no idea how this DIY graduation decor project would turn out but I’m happy with the end result.

Graduation Cap Reverse Canvas
This Dollar Tree DIY can easily be customized to any color palette and tucked into many displays.
I removed the canvas from a five-by-seven-inch stretched canvas from Dollar Tree.
Then I gave the entire frame a coat of black chalk paint.
I trimmed the canvas to fit on the back of the wood frame.
I used my Cricut machine to cut a graduation cap out of heat transfer vinyl and secured it to the canvas with heat-resistant tape.
Then I applied heat with my Easy Press Mini to adhere the cap to the canvas.
To finish this 5-minute craft project, I carefully attached the frame to the front of the canvas with hot glue.

DIY Graduation Cap
I have a few little marshmallow mugs that I like to display on my tiered tray and for this project, I decided to create a graduation cap for one of them.
For the top of the hat, I cut a square out of a scrap piece of Dollar Tree Foam board. I cut a strip of poster board for the bottom of the hat.
I covered the foam square and poster board with black adhesive vinyl from Dollar Tree.
Next, I used black and white baker’s twine to make a tassel for the cap. Check out this video if you’d like detailed instructions for making tassels.
I placed a silver thumbtack in the center of the top of the cap and tied the tassel to the tack, trimming the excess twine. Next, I turned the cap over and put hot glue over the sharp piece to prevent someone from getting poked and to help secure the tack in place.
Then I put the hat on the mug and added it to my graduation display.
Check out the video below to see a full tutorial for these Dollar Tree Graduation DIYs.
** As an Amazon Associate, I earn from qualifying purchases. This means that I earn a small commission from items purchased through my shared links at no cost to you. Thank you for your continued support of Made on Maple Street!