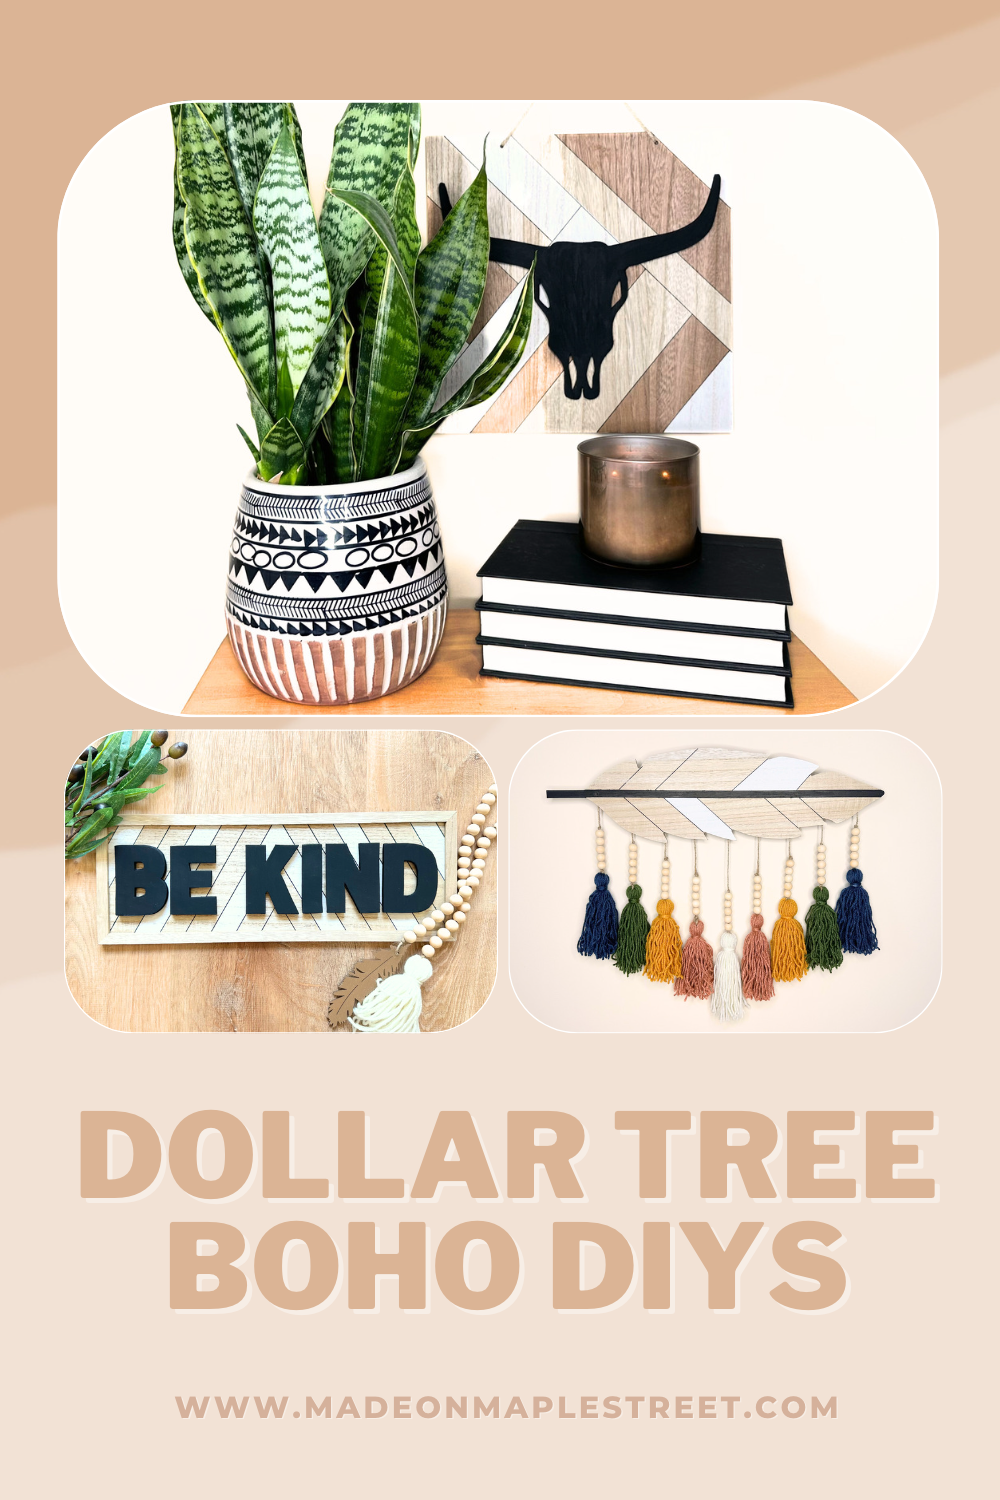
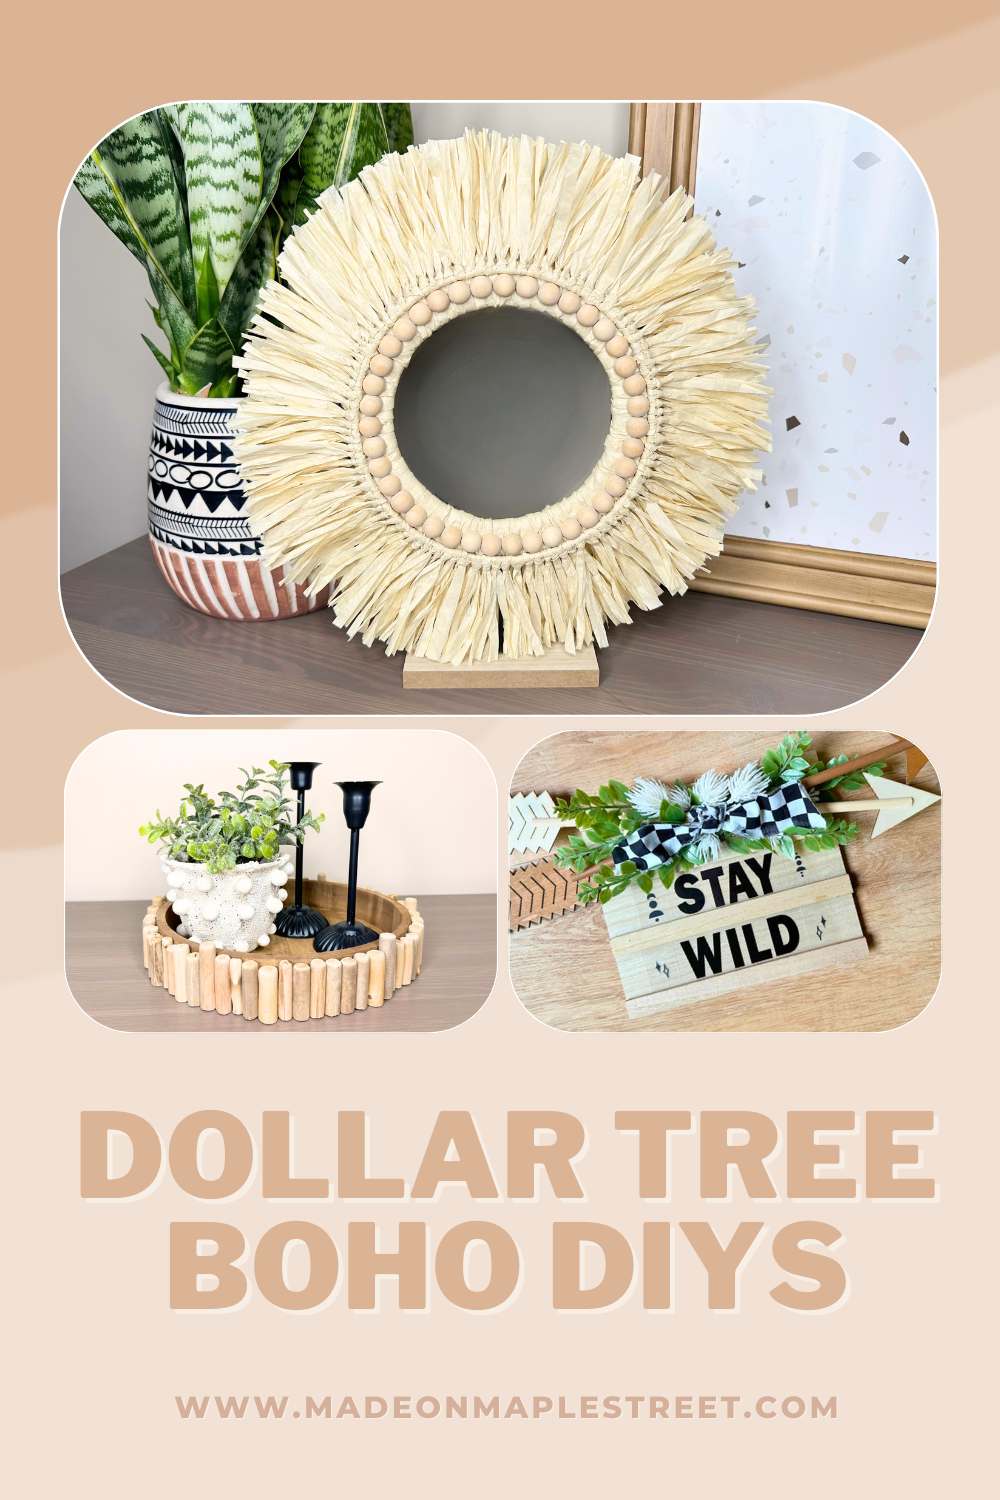
Dollar Tree Boho DIYs
Earlier this year, Dollar Tree released a new line of home decor products and I fell in love with the items as soon as I saw them on display at my local store. I picked up several pieces because I knew they would be perfect bases for craft projects.
I used several of these inexpensive products from Dollar Tree to create beautiful new pieces of DIY boho decor for my home.

Be Kind Sign
For this Dollar Tree DIY, I started by printing the words “Be Kind” on a piece of cardstock and cutting them out.
To make the letters stand out, traced them on a piece of black Dollar Tree foam board.
I used a hot knife to cut out the letters because I find that it cuts foam very smoothly. If you choose to use this tool, be very careful because it gets super hot.
Then I gave the front and sides of the letters a coat of black chalk paint. Once the paint dried, I placed small pieces of foam tape on the back of each letter.
I finished this quick DIY by removing the backing from the foam tape and sticking the letters down onto the sign.
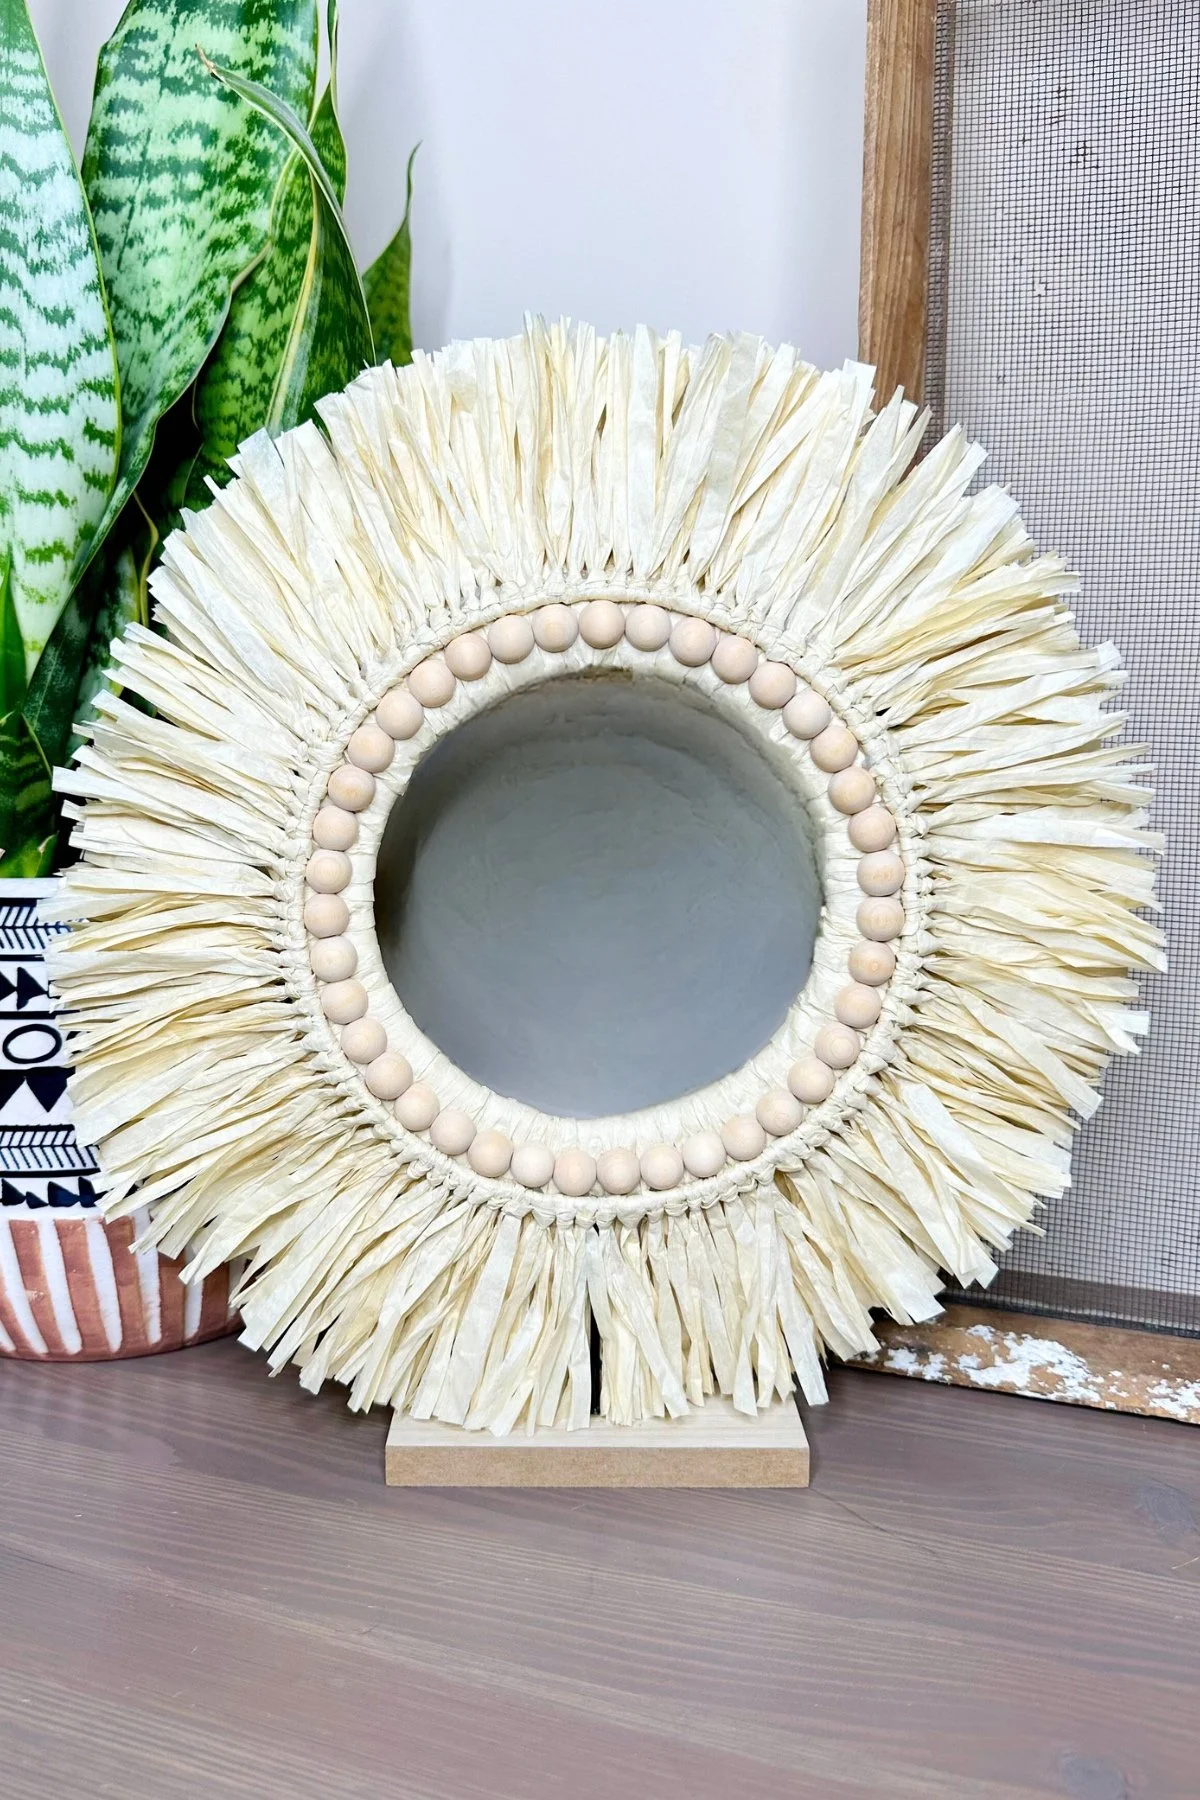
Beaded Circular Stand
This DIY boho decor piece was time intensive but I am so happy with the way it turned out.
For the base of the project, I started with a circular photo stand from Dollar Tree.
I laid the stand on a piece of Dollar Tree foam board and traced around the circle.
I wanted the center of the circle to be open so I placed a roll of duct tape inside the original circle and traced around it with a pencil.
I used a hot knife to cut out the circles and set them aside for later.
To add texture to the stand, I removed several pieces of raffia from a Dollar Tree luau skirt and attached them to the circle by looping them around the metal frame.
After attaching several pieces of raffia, I trimmed them down to about 6 centimeters long. I used a ruler to ensure that all of the pieces were the same length.
Once the metal frame was covered, I attached more pieces of raffia to the foam circle I cut out earlier.
When the foam circle was covered in raffia, I attached the two circles with hot glue.
Then I used steel snips to cut several wood beads in half and arranged them on the foam circle. I used hot glue to secure the beads in place.
To finish this project, I trimmed the raffia on the foam circle to make it even with the raffia on the metal frame.
This Dollar Tree boho DIY turned out better than I expected and I love the end result.
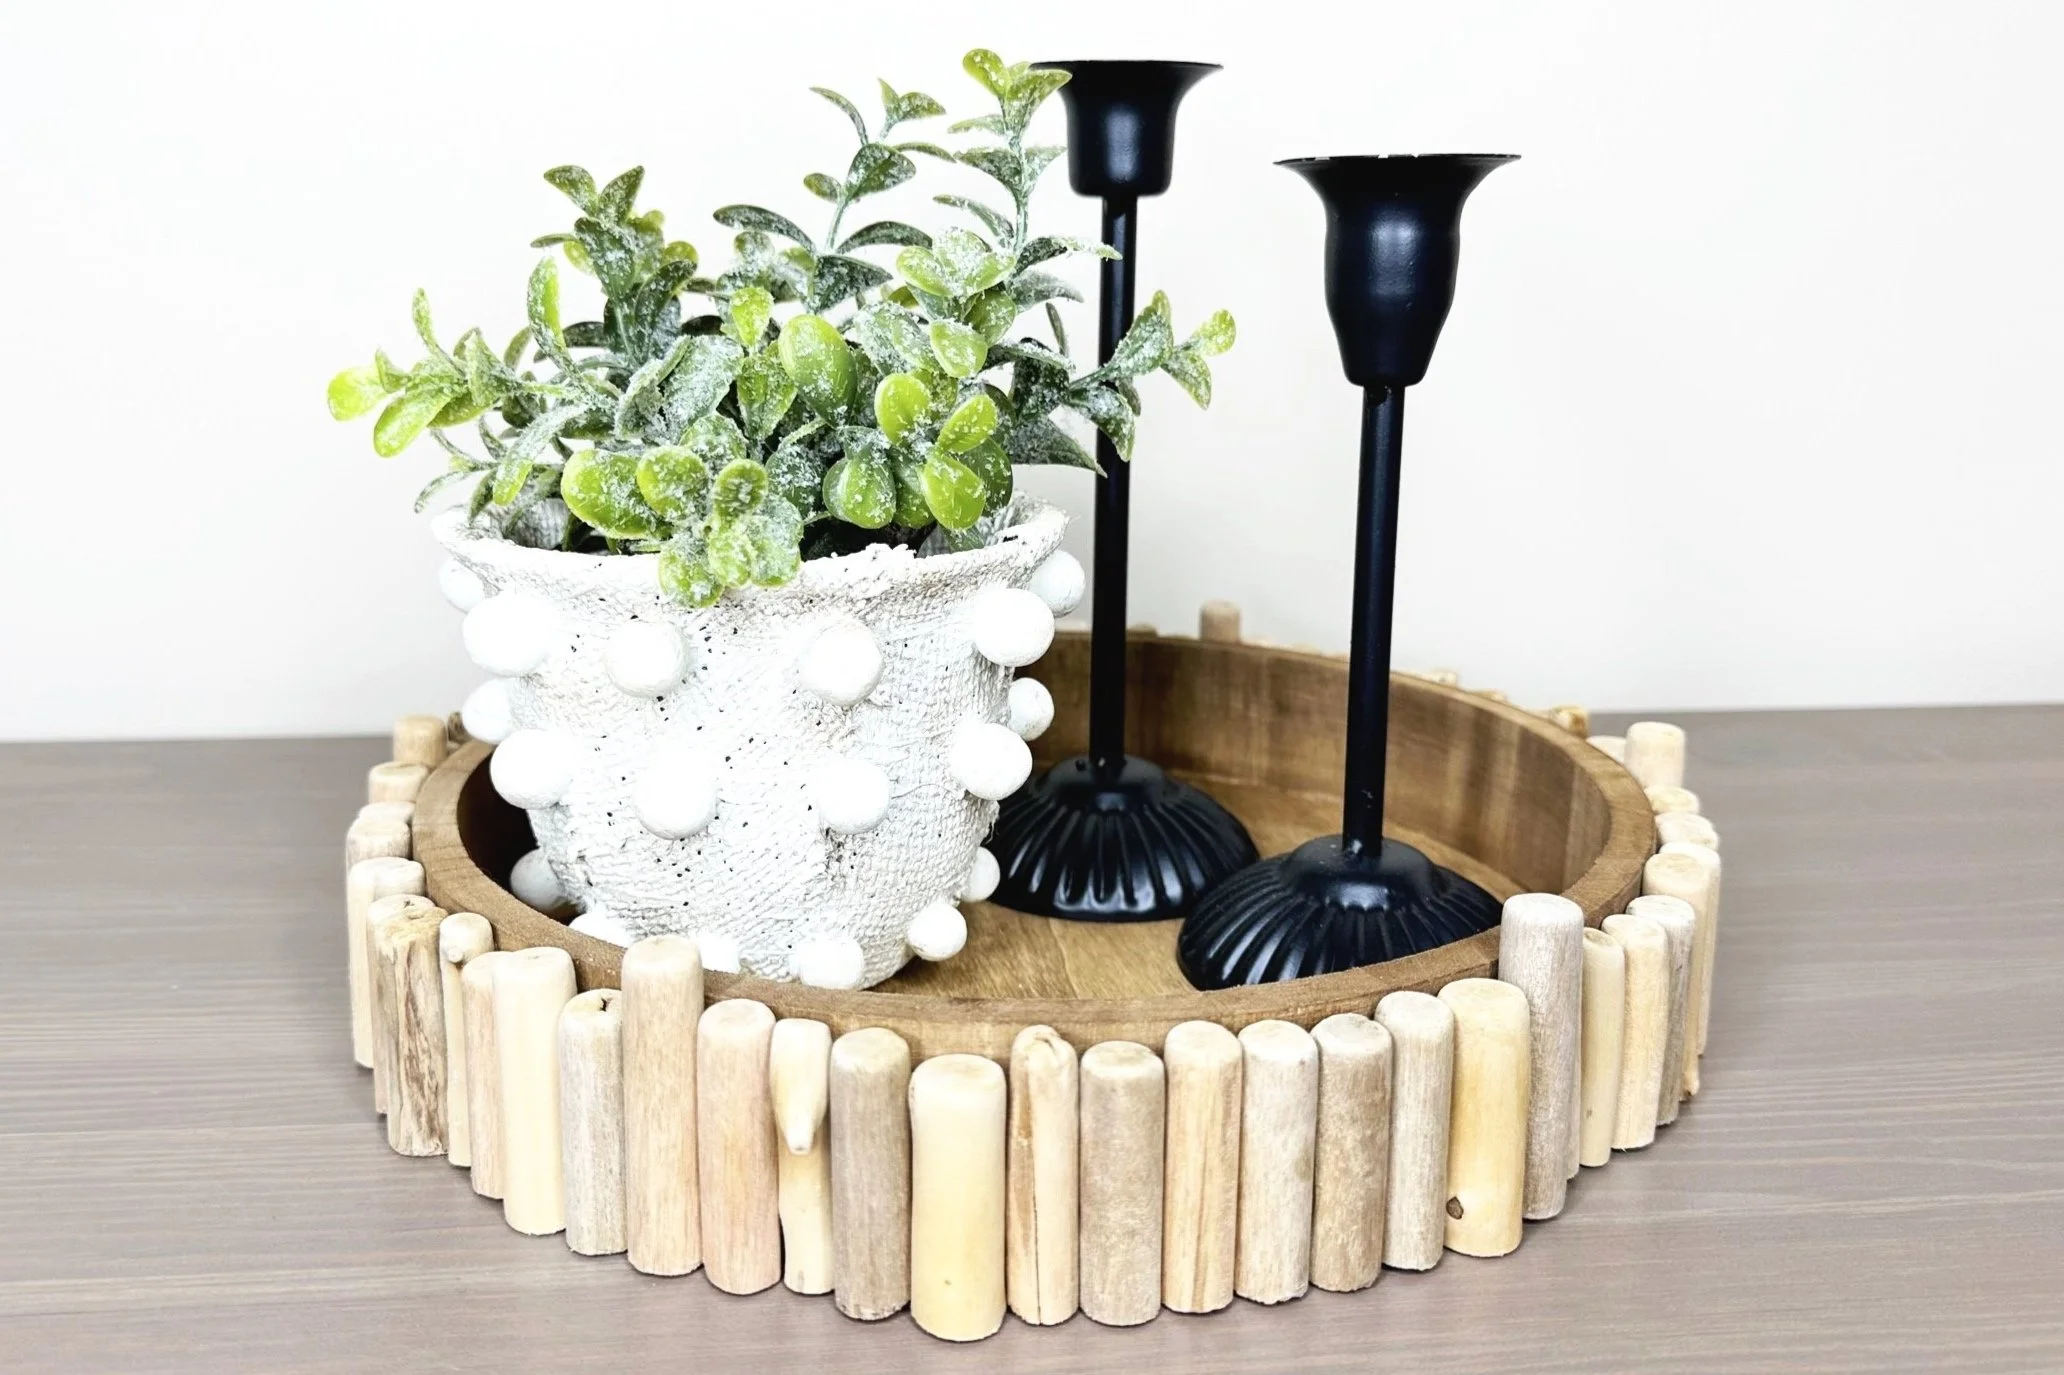
Wooden Tray
I’m a big fan of circular trays from Dollar Tree because they can be used for many different craft projects.
For this simple DIY, I applied a coat of antique wax to a circular tray using a baby wipe.
To embellish the outside of the tray, I purchased a few packages of wood slices from Dollar Tree.
I used a miter saw to cut the wood slices in half and sanded the rough edges with a sanding sponge.
Then I used Tacky Glue to attach the wood slices to the outside of the tray, making sure to evenly disperse the taller and shorter wood pieces.
The best thing about this versatile piece is that the styling options are endless.

Feather Wall Hanging
When I purchased this large wooden feather at Dollar Tree, I wasn’t quite sure what I wanted to use it for but after browsing on Pinterest one afternoon, I came up with an idea.
After removing the twine hanger from the feather, I filled in the hole with wood filler.
Once the wood filler dried, I gave it a light sanding with a sanding sponge.
Next, I painted the line in the center of the feather with a black paint marker.
To add thickness to the back of the feather, I used wood glue to attach a paint stir stick and set it aside to dry.
While the glue was drying, I used Dollar Tree yarn to create several tassels for the feather. I added five wooden beads to the twine at the top of each tassel and tied a knot above the beads.
After making all of the tassels, I arranged them in a staggered pattern below the feather.
I used hot glue to permanently attach the twine pieces to the back of the feather.
I’m happy with the way this piece turned out and love that it can be personalized by using yarn colors that match your decor.

Longhorn Sign
For this Dollar Tree DIY, I found a longhorn skull graphic on Canva and printed it on cardstock to use as a template.
After cutting out the template, I placed the longhorn on a piece of black Dollar Tree foam board and traced it.
I used a hot knife to cut out the longhorn shape.
To cover up the white foam that was showing, I gave the front and sides a coat of black chalk paint.
Once the paint was dry, I cut strips of foam tape and placed them on the back of the longhorn.
I removed the backing from each piece of tape and attached the longhorn to the center of this Dollar Tree sign.
This DIY boho decor piece turned out exactly the way I was hoping it would. I could have created a similar look with black vinyl but I love the dimension that the foam board adds to the sign.

Letter Board
I am a big fan of home decor pieces that can be used in many different ways and this letter board is no exception.
The Dollar Tree board came with its own set of letters but I wanted letters with a transparent background so I created my own using transparency film and letter stickers from Hobby Lobby.
I created a few additional decals using a set of Dollar Tree rub-on transfers.
To embellish the top of the piece, I used a combination of wooden arrows, floral stems from my craft stash, and fabric from Dollar Tree.
This DIY turned out better than I was expecting and I am so happy with the end result.

Life is Golden Sign
I discovered a dog-shaped sign at Dollar Tree and immediately knew I wanted to give it a makeover.
After removing the paper from the front of the sign, I painted it to match the color of my dog’s fur.
Once the paint was dry, I applied a black vinyl decal that says “Life is Golden With a Doodle” that I designed it Cricut Design Space.
I finished the sign by adding a strip of fabric from a piece I purchased at Dollar Tree.

I love this sign so much and despite his blank stare, my dog Murphy thinks its pretty rad too.
Check out the video below to see a full tutorial for these Dollar Tree Boho DIYs.
** As an Amazon Associate, I earn from qualifying purchases. This means that I earn a small commission from items purchased through my shared links at no cost to you. Thank you for your continued support of Made on Maple Street!